There are these 2 features that easily seen as soon as we clicked at our character
3D Settings
3D Character Settings
And, don't forget that we can configure how big our character looks like manually, by dragging that box surrounding them.

Inner Box (Blue Box) :: Configure the position of the character inside the area (Outer box), we also able to rotate the character
3D Character Settings


Here, we can change our character face, especially eyes and mouth. Well, we are here to give some expression to our character.
Mouth Position :: Configure the space between the mouth and the nose
Mouth Width :: Configure the width of the mouth
Mouth Height :: Configure the thickness of the mouth
Overlay Eye Brow :: Configure whether the eyebrow can be seen even through the hair (bang) or not
Auto Preview :: so we can see the changes as we do the editing
Change Pose (second icon)

Here, we can change our character pose, walking, standing, sitting, or others.
Head Up Down :: Configure whether the head is looking up or looking down
Head Left Right :: Configure whether the head is looking to the left or to the right
Head Tilt :: Configure whether the head tilted to the left or to the right
Head Position :: Configure how close the head with the shoulder (the neck will adjust)
Head Size :: Configure how big is the head
Auto Preview :: so we can see the changes as we do the editing
Change Item (third icon)

Here, we can change how our character looks like, the glasess, cheek, or even hair. And of course we can also give our character some items in this feature.
Target :: Configure what we want to edit / add
Detail (only available for items) :: Configure what part we want to edit / add
Position :: Configure the position of the item
Rotate :: Configure the rotation of the item
Size :: Configure how big is the item
Auto Preview :: so we can see the changes as we do the editing
Change Skin Color (fourth icon)

Here, we can change the color of our character.
Change Skin Color :: Configure the character skin
:: yeah, might be useful when the character fell into mud, have a sunburn, poured by flour, or got mixed up in an experiment.
3D Settings

Camera Angle (first icon)
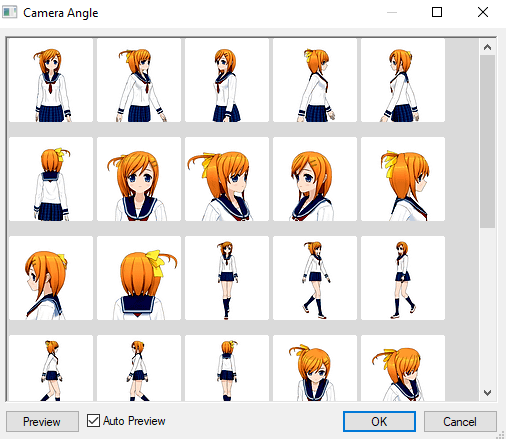
Here, we can change the perspective of the camera, or how we show our character.
:: if you're not satisfied with how it looks like, do edit the character angle manually (use the mouse)
Change Model (second icon)

Here, we can instantly change our character.
If we haven't create all of our character, and still trying to create one, but we already have tons of ideas for our comic, then do make the comic first. With this feature, we can easily change our character,
:: do notice that it's better to use a female base for female character and male base for male character, it seems they have different pose.
3D Outline Setting (third icon)

Here, we can edit the line thickness of our character. Those lines surrounding the character.
We can even the color!
If you want to see all of the editing in action, here is a short-video showing the editing I did
Hope this help you!


No comments:
Post a Comment